Master Easy Oven Baby Back Ribs: Fall-Off-The-Bone Every Time
Imagine sinking your teeth into incredibly tender, juicy ribs, where the meat effortlessly glides off the bone with every bite. The kind of ribs that leave you with sticky fingers and a satisfied smile. While many believe such perfection requires a smoker or grill master skills, we're here to reveal a delicious secret: your oven is all you need to create the most incredible fall-off-the-bone baby back ribs recipe. Get ready to elevate your home cooking with this ridiculously easy, low-effort method that promises maximum flavor and minimum fuss.
Forget complicated techniques or special equipment. This approach to oven-baked ribs relies on simple pantry staples and the consistent, gentle heat of your oven to transform a humble rack of ribs into a culinary masterpiece. We'll guide you through every step, from choosing the right ribs to achieving that perfect caramelized crust, ensuring your results are consistently outstanding.
Why Oven-Baked Ribs Are Your Secret Weapon
When it comes to preparing delectable ribs, the oven often gets overlooked in favor of outdoor grilling. However, embracing your oven for this task comes with a myriad of benefits that make it an unbeatable method for any home cook.
Firstly,
convenience is king. With oven-baked ribs, you don't have to contend with unpredictable weather, messy charcoal, or the constant monitoring that grilling often demands. Simply set your oven, slide in your ribs, and let it work its magic. This hands-off approach frees you up to prepare side dishes, entertain guests, or simply relax. Cleanup is also a breeze compared to scrubbing down a grill.
Secondly, the oven provides
unparalleled consistency. Achieving that perfect "low and slow" cooking environment, crucial for tenderizing tough cuts like ribs, is inherently easier and more controlled indoors. The enclosed space circulates heat evenly, ensuring every part of the rib rack cooks uniformly, resulting in a consistent, fall-off-the-bone texture every single time. This reliability makes it an ideal method for beginners and seasoned cooks alike. You truly can set it and forget it for a few hours, confident that your baby back ribs recipe will turn out perfectly.
Finally, the oven simplifies the process to just a few pantry staples. You won't need an arsenal of rubs, marinades, or specialized tools. A good rack of ribs, a simple dry rub, and your favorite barbecue sauce are all you require. It's a testament to how fantastic food can be when simplicity meets excellent technique.
Understanding Your Ribs: Baby Backs and Beyond
Before we dive into the cooking process, let's talk about the star of our show: baby back ribs. While this recipe is incredibly versatile and works wonderfully with spareribs and St. Louis-style ribs too, baby backs hold a special place for many home cooks due to their distinct characteristics.
Baby Back Ribs are aptly named, as they come from the top of the rib cage, specifically from around the loin muscle. They are shorter, curvier, and typically leaner than spareribs, featuring generous amounts of succulent meat nestled between and on top of the bones. Because they contain more lean muscle and less fat, they tend to cook a bit faster and are often considered a more "meaty" and tender option, though they are usually a bit pricier. Their elegant appearance and rich flavor make them a popular choice for entertaining.
For completeness, let's briefly touch upon other popular rib cuts:
* **Spare Ribs:** These originate from the belly section of the pig, below the loin and behind the shoulder. They are larger, flatter, and contain more fat and bone than baby backs. The meat tends to be between the bones rather than on top. This higher fat content makes them incredibly flavorful and perfect for low and slow cooking, as the fat renders down, moistening the meat.
* **St. Louis-Style Ribs:** Essentially, these are spare ribs that have been trimmed and squared off by a butcher. The sternum bone and cartilage are removed, creating a more uniform, rectangular rack that's easier to handle and carve. They offer the rich flavor of spareribs but with a tidier presentation, making them a favorite for competition BBQ.
While all these cuts benefit from the low and slow oven treatment, baby back ribs offer a fantastic balance of tenderness, flavor, and lean meat, making them an excellent choice for our definitive
Unlock Melt-In-Your-Mouth Baby Back Ribs: Oven Secrets Revealed recipe.
The Crucial First Step: Removing the Membrane
For truly fall-off-the-bone, melt-in-your-mouth ribs, there's one simple prep step you absolutely shouldn't skip: removing the membrane (also known as the "silver skin") from the bone side of the ribs. While not strictly required for edibility, this thin, opaque layer can become tough and chewy when cooked, preventing your ribs from reaching their full tender potential. It also acts as a barrier, hindering your delicious spice rub and barbecue sauce from fully penetrating the meat.
Don't be intimidated – it's incredibly easy to do:
1.
Flip the Ribs: Place your rib rack bone-side up on a clean cutting board. You'll see a thin, somewhat shiny, almost plastic-like membrane covering the entire surface.
2.
Loosen a Corner: Using a butter knife, the tip of a spoon, or even your fingers, gently slide it under the membrane on one end of the rack, near a bone. Lift and loosen a small section, creating a flap.
3.
Get a Grip: Once you have a small flap loosened, grab it firmly with a paper towel. The paper towel provides excellent grip, preventing your fingers from slipping.
4.
Pull it Off: Slowly but firmly pull the membrane across the rack, peeling it away from the bones. It should come off in one large piece. If it tears, simply re-grip any remaining sections with your paper towel and continue pulling until all major pieces are removed.
This small effort makes a significant difference in the final texture of your ribs.
The Ultimate Oven Baby Back Ribs Recipe: Step-by-Step
Now, for the main event! Here’s how to create those irresistible baby back ribs in your oven, ensuring they’re tender, flavorful, and perfectly sauced.
What You'll Need:
* 1 rack (about 2-3 lbs) baby back ribs
* For the Dry Rub (adjust to your taste):
* 2 tbsp brown sugar
* 1 tbsp smoked paprika
* 1 tbsp garlic powder
* 1 tbsp onion powder
* 1 tsp salt
* 1 tsp black pepper
* 1/2 tsp cayenne pepper (optional, for a kick)
* 1-1.5 cups of your favorite BBQ sauce (homemade or high-quality store-bought)
* Aluminum foil
* Large baking sheet or roasting pan
**Instructions:**
1.
Prepare the Ribs: If you haven't already, remove the membrane from the bone side of the ribs as described above. Pat the entire rack dry with paper towels. This helps the rub adhere better and creates a better crust.
2.
Apply the Dry Rub: In a small bowl, combine all your dry rub ingredients. Generously sprinkle and rub the mixture all over both sides of the ribs, pressing it gently into the meat. Don't be shy – this is where much of the flavor comes from! For even deeper flavor, you can rub them the night before and let them marinate in the fridge.
3.
Wrap for Tenderness: Lay out a large piece of heavy-duty aluminum foil on your baking sheet. Place the seasoned ribs bone-side up on the foil. Wrap the ribs very tightly in the foil, creating a sealed packet. You might need two layers of foil to prevent any steam from escaping. The goal is to essentially steam the ribs in their own juices, breaking down tough connective tissue.
4.
Bake Low and Slow: Preheat your oven to 275°F (135°C). Place the foil-wrapped ribs on the baking sheet in the preheated oven. Bake for approximately 2.5 to 3 hours for baby back ribs, or until they are very tender and almost falling apart. You'll know they're ready when a bone can be easily wiggled and pulled out.
5.
Sauce and Broil: Carefully remove the ribs from the oven. Unwrap the foil, being cautious of the hot steam. You'll likely see some liquid in the foil – you can drain this off or reserve it for other uses. Brush a generous layer of your favorite BBQ sauce over both sides of the ribs.
6.
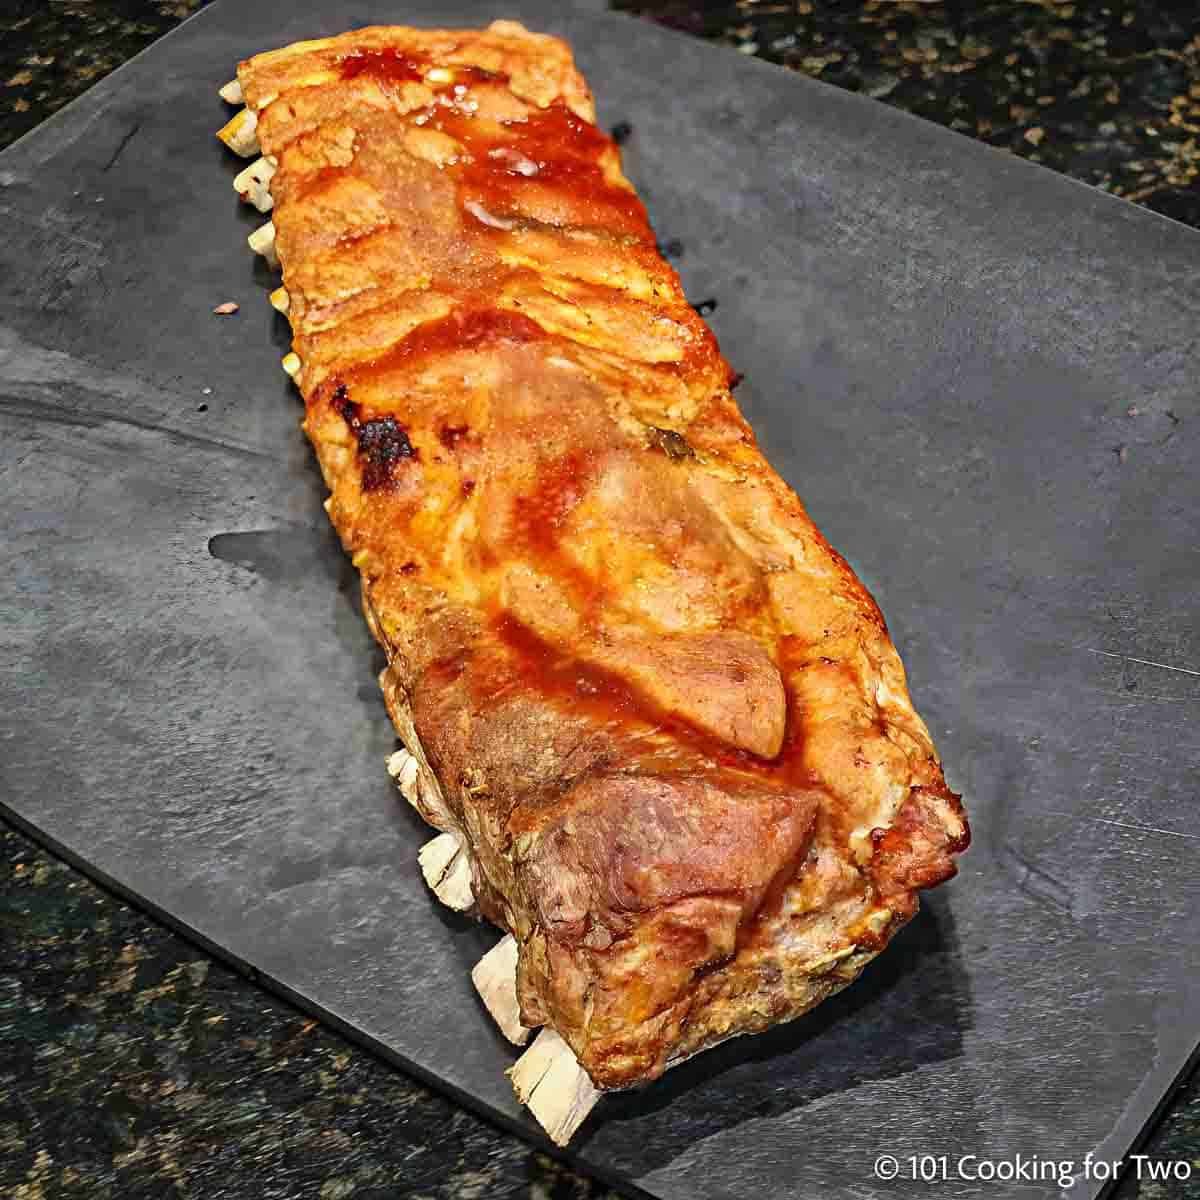
Caramelize Under the Broiler: Increase your oven temperature to "broil." Position an oven rack about 6 inches from the broiler element. Place the sauced ribs back on the baking sheet (uncovered) and slide them under the broiler. Watch them very carefully! Broil for 5-10 minutes, flipping once if needed, until the sauce is bubbly, slightly caramelized, and has a beautiful sticky glaze. This quick burst of intense heat replicates the char of a grill, creating that irresistible finish.
Once done, remove the ribs from the oven and let them rest for 5-10 minutes before slicing between the bones and serving. This allows the juices to redistribute, ensuring every bite is moist and flavorful. Our method for
Effortless Oven Baked Ribs: Baby Back, Spare, & St. Louis-Style is adaptable for any rib type!
Expert Tips for Rib Perfection
Achieving truly legendary ribs consistently means paying attention to a few finer details:
*
Don't Rush the Process: The "low and slow" cooking method is non-negotiable for tender ribs. Resist the urge to crank up the heat to save time. Patience is rewarded with unparalleled tenderness.
*
Customize Your Rub and Sauce: The beauty of this recipe is its adaptability. Experiment with different spice blends – add smoked paprika for a deeper flavor, more cayenne for heat, or dry mustard for tang. Similarly, choose a BBQ sauce that suits your palate, whether it's smoky, sweet, tangy, or spicy. Homemade sauces often take ribs to the next level!
*
Broiler Vigilance: When broiling, stay by the oven. BBQ sauce contains sugar, which can go from perfectly caramelized to burnt in a matter of seconds. Keep a close eye and pull them out as soon as they reach that beautiful, sticky glaze.
*
Resting is Key: Just like with any cooked meat, letting the ribs rest for a few minutes after coming out of the oven allows the muscle fibers to relax and reabsorb the juices. This makes for a more tender and moist final product.
*
Double Up for a Crowd: This recipe scales beautifully. If you're cooking for a crowd, simply prepare multiple racks, ensuring each is tightly wrapped in foil and placed on its own baking sheet to prevent overcrowding.
Conclusion
There you have it – the ultimate guide to mastering easy oven baby back ribs that are guaranteed to be fall-off-the-bone tender every single time. By understanding your cuts, taking the crucial step of membrane removal, and utilizing the forgiving "low and slow" method in your oven, you can create barbecue perfection without the need for a grill or smoker. This straightforward yet incredibly effective recipe proves that delicious, restaurant-quality ribs are well within the reach of any home cook. So, grab a rack of ribs, fire up your oven, and prepare to impress your taste buds and your guests with this fantastic, fuss-free baby back ribs recipe!