Effortless Oven Baked Ribs: Baby Back, Spare, & St. Louis-Style
Imagine sinking your teeth into ribs so tender they practically melt in your mouth, effortlessly sliding off the bone with every bite. Now, picture achieving this culinary dream without firing up a grill, monitoring charcoal, or battling the elements. Welcome to the world of oven-baked ribs – a remarkably simple yet incredibly rewarding method that consistently delivers fall-off-the-bone perfection, whether you're craving a classic baby back ribs recipe, hearty spare ribs, or succulent St. Louis-style cuts. This isn't just a convenient cooking method; it's a game-changer. Our oven-baked approach requires minimal effort and no special equipment beyond what you likely already have in your kitchen. Just a simple spice rub, a few hours of hands-off baking, and a final glorious glaze transform ordinary ribs into an extraordinary feast. Get ready to sit back, relax, and let your oven do all the hard work, promising juicy, flavorful ribs every single time.Why the Oven is Your Rib-Making Best Friend
When it comes to crafting truly exceptional ribs, the oven often gets overlooked in favor of the grill or smoker. However, for sheer ease, consistency, and unparalleled tenderness, the oven is an undisputed champion. There are several compelling reasons why it should be your go-to for your next rib endeavor:- Unmatched Consistency: Unlike outdoor cooking, where flare-ups, wind, and ambient temperature can wreak havoc, your oven provides a stable, controlled environment. This ensures even cooking from start to finish, leading to uniformly tender results.
- Effortless and Hands-Off: Once your ribs are prepped and in the oven, your work is largely done. The "low and slow" cooking method means minimal supervision, freeing you up to prepare sides, enjoy company, or simply relax. Forget constant flipping or temperature adjustments.
- Weatherproof Cooking: Craving ribs on a rainy day? No problem. The oven eliminates any dependency on good weather, allowing you to indulge in your favorite barbecue flavors any time of year.
- Consistent Moisture: By wrapping the ribs during the baking process, the oven creates a steamy, self-basting environment that locks in moisture. This prevents drying out and is key to achieving that supremely juicy texture.
- No Special Equipment: You don't need a smoker, special grill accessories, or even a deep fryer. A baking sheet, foil, and your trusty oven are all the tools required to create show-stopping ribs.
Deciphering Your Rib Options: Baby Back, Spare, & St. Louis
While this recipe works beautifully for all major rib types, understanding their unique characteristics can help you appreciate the nuances of each. Each cut offers a slightly different eating experience, though all benefit immensely from the low and slow oven treatment.Baby Back Ribs
Often considered the leanest and most tender of the pork rib family, baby back ribs are cut from around the loin section of the pig, close to the spine. They are shorter, curvier, and boast a good amount of lean meat situated both between and atop the bones. Their smaller size and delicate meat make them quick to cook relative to other cuts, and they are incredibly popular for a reason – they deliver that classic "fall-off-the-bone" sensation with incredible flavor. While typically more expensive, they are a fantastic choice if you're looking for an indulgent baby back ribs recipe.
Spare Ribs
Hailing from the belly section of the pig, spare ribs are larger and straighter than baby backs. They contain more fat and connective tissue, which might sound less appealing but is actually a huge advantage for low and slow cooking. This higher fat content renders down during the long bake, infusing the meat with incredible juiciness and a rich, robust pork flavor. The meat sits more between the bones rather than on top, providing a satisfying, meaty bite perfect for barbecue enthusiasts.
St. Louis-Style Ribs
Essentially, St. Louis-style ribs are spare ribs that have undergone a bit of butchering artistry. A butcher trims away the sternum, cartilage, and any excess fat or flaps, resulting in a neater, rectangular rack. This uniform shape makes them easier to handle, season, and serve, without sacrificing any of the fantastic flavor or fat content found in full spare ribs. Many pitmasters and home cooks prefer St. Louis-style for their balance of flavor, texture, and ease of handling.
The Secret to Supreme Tenderness: Prep and Process
Achieving truly tender, flavorful ribs isn't magic; it's a science of careful preparation and patient cooking. These steps are crucial for transforming tough cuts into culinary masterpieces.The Essential Membrane Removal
This step, while often overlooked by novices, is arguably the most critical for ensuring truly tender ribs. The membrane, also known as the silver skin, is a thin, tough layer on the bone side of the rib rack. If left intact, it won't break down during cooking, resulting in a chewy, less pleasant texture that can also prevent your delicious spice rub and sauce from fully penetrating the meat.
How to Remove It:
- Flip the ribs bone-side up. Locate the shiny, almost plastic-like membrane covering the entire back of the rack.
- Using a butter knife or the tip of a spoon, carefully slide it under the membrane at one end, near a bone. Gently lift and loosen a small section.
- Once you have a piece loosened, grab it firmly with a paper towel for a better grip (it can be slippery!).
- Slowly and steadily pull the membrane away from the bones. It might come off in one satisfying piece, or it might tear. Don't worry if it tears; simply lift any remaining pieces with your fingers or the knife tip until it's all gone.
Trust us, this extra minute of effort makes an immense difference in the final texture of your ribs! To truly Unlock Melt-In-Your-Mouth Baby Back Ribs: Oven Secrets Revealed, this step is non-negotiable.
Crafting the Perfect Rub
A good dry rub is the foundation of flavor for your ribs. It seasons the meat deeply and, with the help of low heat, begins to form a beautiful bark. While countless commercial rubs exist, a homemade blend is easy and allows for customization.
A basic, yet effective rub often includes:
- Kosher salt and freshly ground black pepper
- Smoked paprika (for color and depth)
- Garlic powder and onion powder
- Brown sugar (crucial for caramelization and balance against savory notes)
- A touch of cayenne or chili powder for a subtle kick (optional)
Pat your ribs dry with paper towels before generously applying the rub to all sides. Don't be shy – really massage it into the meat. For best results, let the rubbed ribs rest in the refrigerator for at least 30 minutes, or even a few hours, to allow the flavors to penetrate.
Low and Slow: The Oven's Magic
This is where the oven truly shines. The principle of "low and slow" cooking is simple: use a moderate temperature (typically around 250-275°F or 120-135°C) for an extended period. This gentle heat slowly breaks down tough connective tissues (collagen) into gelatin, which makes the meat incredibly tender and succulent. The fat also renders down slowly, basting the meat from within and contributing to its rich flavor profile.
The process typically involves:
- Wrapping the seasoned ribs tightly in heavy-duty aluminum foil. This creates a steamy, moist environment, crucial for breaking down the tough fibers.
- Baking for approximately 2.5-3.5 hours for baby back ribs, and 3-4.5 hours for spare or St. Louis-style ribs, depending on their size and thickness. The ribs are ready when they are very tender, and the meat has visibly pulled back from the ends of the bones.
This extended cooking time is what transforms tough cuts into the legendary fall-off-the-bone experience. For a deeper dive into mastering this technique specifically for baby back ribs, explore our guide on Master Easy Oven Baby Back Ribs: Fall-Off-The-Bone Every Time.
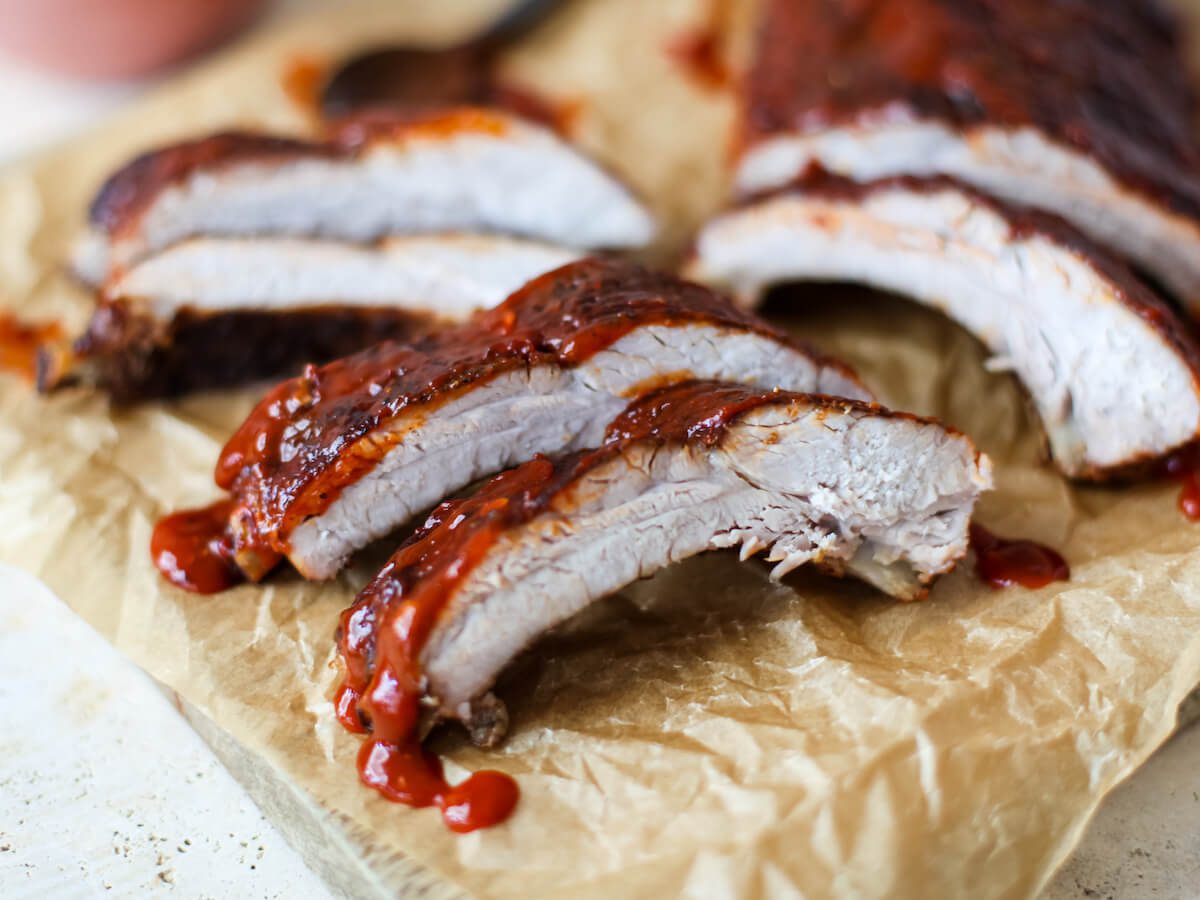
Achieving That Irresistible Glaze: The Broiler Finish
The final flourish for your oven-baked ribs is the glorious glaze. After their long, tenderizing bath in the oven, it's time to introduce them to the magic of barbecue sauce and the intense heat of the broiler. This step mimics the caramelization and slight char you'd get from a grill, creating that sticky, finger-licking finish we all adore.Once your ribs are tender, carefully remove them from the foil, discard any accumulated liquid, and place them on a clean baking sheet, bone-side down. Liberally brush your favorite barbecue sauce over the top surface of the ribs. Now, it's broiler time!
Broiling Tips for Perfection:
- Positioning is Key: Adjust your oven rack so the ribs are about 6 inches away from the broiler element. This distance allows for even browning without direct scorching.
- Watch Like a Hawk: Broilers are powerful, and sauces (especially those with sugar) can burn very quickly. Keep a close eye on your ribs, turning the baking sheet if necessary to ensure even caramelization.
- Multiple Coats: For a thicker, more layered glaze, you can apply one coat, broil for 3-5 minutes, then pull them out, apply another coat, and broil again. Repeat this 2-3 times for maximum stickiness and flavor.
- Don't Overdo It: The goal is a beautiful, caramelized crust, not a charcoal briquette. Once the sauce is bubbly, slightly darkened, and sticky, your ribs are ready.
